
I recently shared the Features of my Android Test Automation Framework and also the challenges, and, how we overcame those, to make the parallel test execution work well with Android 7.0 devices as well.
In this blog post, I will be sharing the details (including code) of the implementation. If you have not read my post on - Features of my Android Test Automation Framework - I highly recommend you read that first.

We currently have 5 Jenkins Nodes setup as shown below.


We have setup the following jobs in Jenkins for our test executions.


We use the JNLP way to connect the Jenkins Slave to the Jenkins server. For this, we have a template .sh script, which we need to copy and update 2 values in it. This is needed for each new Jenkins Node that we connect.
The template .sh script can be found here (https://github.com/anandbagmar/cucumber-jvm-appium-infra/blob/master/3%20-%20Setup%20Jenkins%20Agent/3.1%20start-e2e-moto.sh).
Now, our Jenkins setup is done. But a big piece is still missing.
In order to run our tests on the Agent, we need some basic software to be installed. To do this, we created a shell script, that will help provision the machine. This is required to be done just once - but we do plan to have multiple Mac Mini host machines that will run various number of Jenkins agents - so the script will help keep same software (including version) on our machines - which means the same test execution environment.
This shell script can be found here - (https://github.com/anandbagmar/cucumber-jvm-appium-infra/blob/master/3%20-%20Setup%20Jenkins%20Agent/3.2%20JenkinsAgentMachineFirstTimeSetup.sh)

Our build tool is gradle. All infrastructure related work is handled via this build.gradle file.
Before we get into the details of the gradle file, it is important to understand what the code structure is.
Via groovy / gradle, we managed to solve the complexity of:

These helper files can be found here (https://github.com/anandbagmar/cucumber-jvm-appium-infra/tree/master/5%20-%20Run%20Tests).
In this blog post, I will be sharing the details (including code) of the implementation. If you have not read my post on - Features of my Android Test Automation Framework - I highly recommend you read that first.
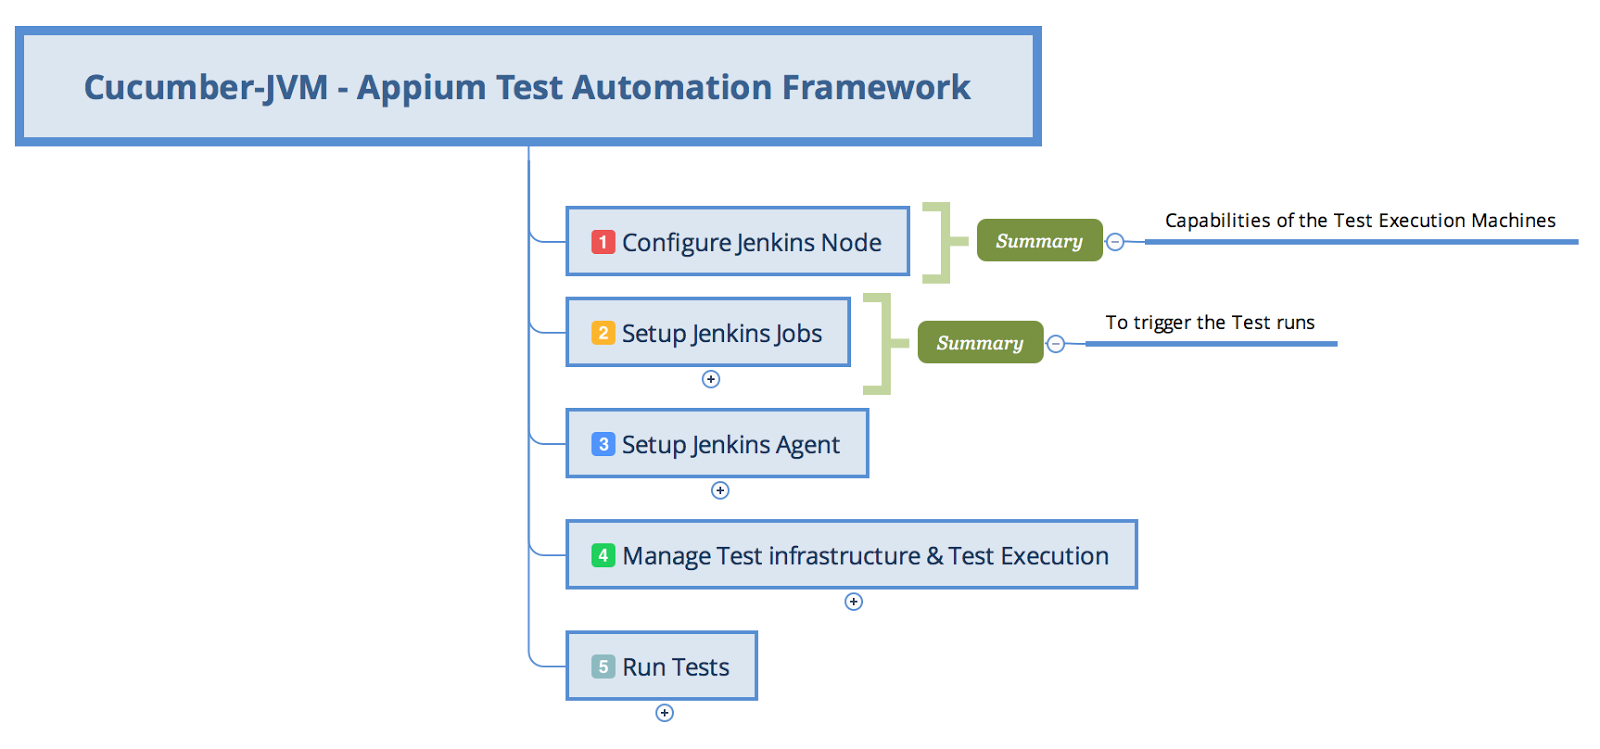
Implementation Details
Tech Stack Summary
To recap - here is the tech stack that we currently have:
- cucumber-jvm - v1.2.5
- cucumber-reporting - v3.5.1
- appium - v1.6.3
- appium-java-client - v5.0.0-BETA2
- appium-uiautomator2-driver - v0.2.3
1. Configure Jenkins Node (in Jenkins Server)

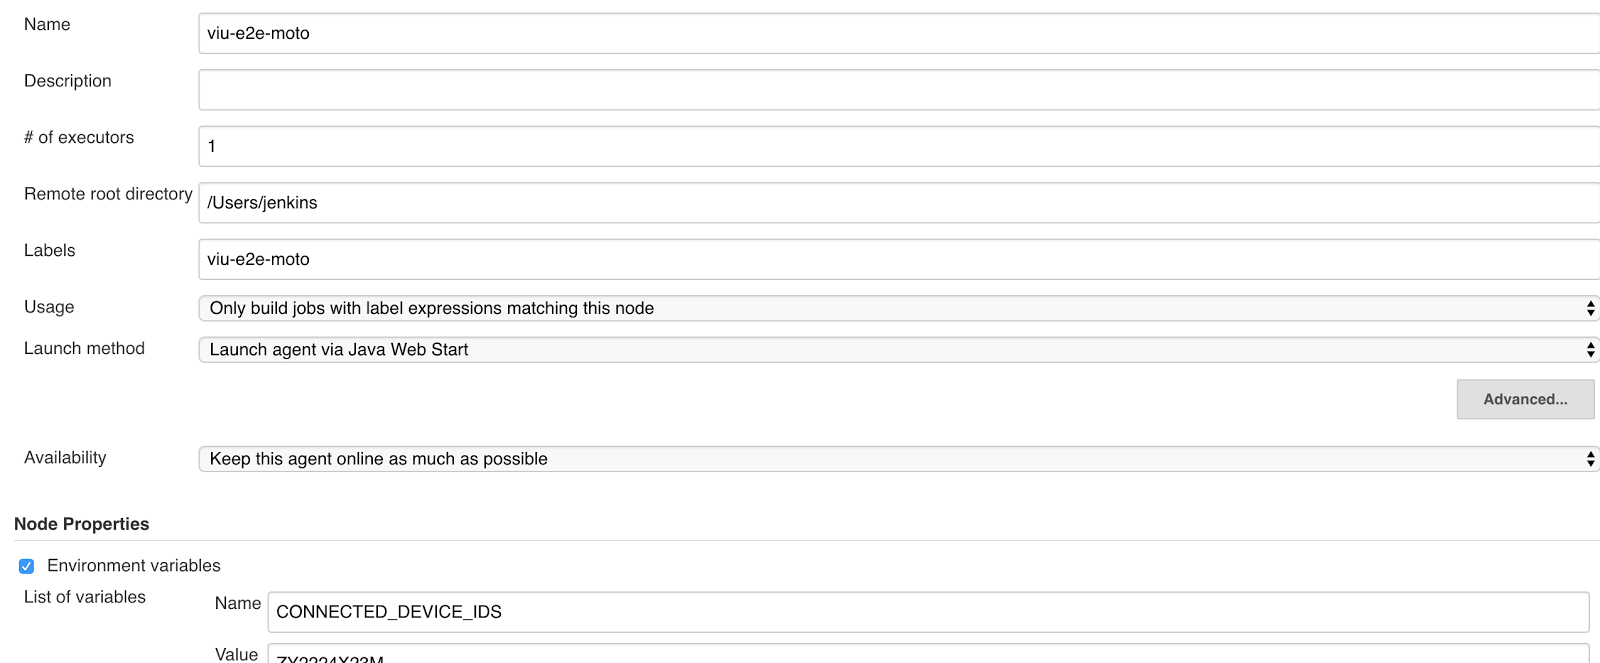
We currently have 5 Jenkins Nodes setup as shown below.

Each node is configured like this:
2. Setup Jenkins Job (in Jenkins Server)
Once the Nodes are setup, we can now configure the Jenkins Jobs.
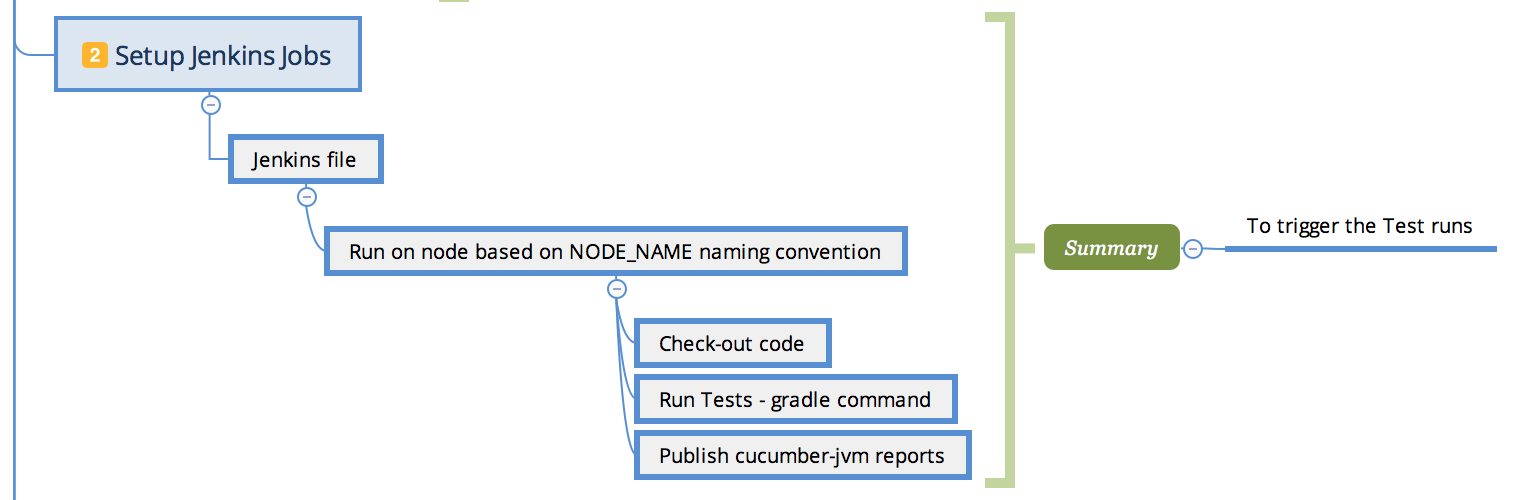
We have setup the following jobs in Jenkins for our test executions.

Each job is configured as a Jenkins Pipeline Project and we use the the Jenkins file available here (https://github.com/anandbagmar/cucumber-jvm-appium-infra/blob/master/2%20-%20Setup%20Jenkins%20Jobs/2.2%20Jenkinsfile) as a sample from git to configure what the job is supposed to do.
3. Setup Jenkins Agent
Once the Jenkins Nodes and Jenkins Jobs are configured, we now need to get the Jenkins Agents itself setup and configured to be able to service the requests from the Jenkins server.
We use the JNLP way to connect the Jenkins Slave to the Jenkins server. For this, we have a template .sh script, which we need to copy and update 2 values in it. This is needed for each new Jenkins Node that we connect.
The template .sh script can be found here (https://github.com/anandbagmar/cucumber-jvm-appium-infra/blob/master/3%20-%20Setup%20Jenkins%20Agent/3.1%20start-e2e-moto.sh).
Now, our Jenkins setup is done. But a big piece is still missing.
In order to run our tests on the Agent, we need some basic software to be installed. To do this, we created a shell script, that will help provision the machine. This is required to be done just once - but we do plan to have multiple Mac Mini host machines that will run various number of Jenkins agents - so the script will help keep same software (including version) on our machines - which means the same test execution environment.
This shell script can be found here - (https://github.com/anandbagmar/cucumber-jvm-appium-infra/blob/master/3%20-%20Setup%20Jenkins%20Agent/3.2%20JenkinsAgentMachineFirstTimeSetup.sh)
4. Manage Test Infrastructure & Test Execution
By this stage, our Jenkins Server, Jenkins Agent setup is done, including the software required to run the tests. Next thing is now at the Test Framework level.
Our build tool is gradle. All infrastructure related work is handled via this build.gradle file.
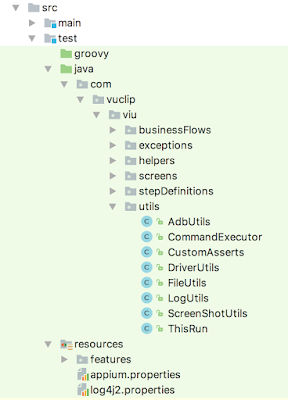
Before we get into the details of the gradle file, it is important to understand what the code structure is.

Via groovy / gradle, we managed to solve the complexity of:
- Finding matching devices based on the CONNECTED_DEVICE_IDS
- Downloading the apk file from where ever it is available
- This is done just once per test run - regardless of how many devices the test is going to run on
- The URL to download is passed as an environment variable - APP_URL
- For local testing, you can give a local absolute path to the apk file via the APP_PATH environment variable instead of specifying APP_URL
- Finding the list of scenarios to be run (based on the cucumber tags specified via the environment variable - 'run'
- Managing start / stop of Appium Servers
- Cleaning up the device before test runs
- Executing Cucumber scenarios in parallel
- Building consolidated reports locally (cucumber-reports) - IF not using the Jenkins cucumber-reports plugin
The gradle file with all this configuration is available here (https://github.com/anandbagmar/cucumber-jvm-appium-infra/blob/master/4%20-%20Manage%20Test%20Infrastructure%20and%20Test%20Execution/4.2%20build.gradle).
5. Run Tests
Last, step in this process - is to manage the Android Driver. We use the Cucumber-jvm's @Before and @After hooks to set the right capabilities for instantiating the AndroidDriver, and also stopping the same after test execution is complete.
These helper files can be found here (https://github.com/anandbagmar/cucumber-jvm-appium-infra/tree/master/5%20-%20Run%20Tests).
No comments:
Post a Comment